PHPMyAdmin is an essential tool to access their MySQL database without exposing the database ports to the world. So, in this article, we will discuss how to install PHPMyAdmin and service it through Nginx using a Debian 10 machine.
Here, this article assumes that you have a Debian 10 machine with Nginx v1.14 and MariaDB v15 or later versions installed.
Contents
- PHPMyAdmin prerequisites
- Download & deploy PHPMyAdmin
- Configure PHPMyAdmin.
- Configure Nginx for PHPMyAdmin.
- PHPMyAdmin for multi Servers
PHPMyAdmin prerequisites
Starting from PHPMyAdmin version 5. It requires PHP 7.1+ to work properly in addition to a few other PHP libraries. Explained as follows:
- PHP and its libraries
- Standard PHP Library (php-common) like ( SPL extension, hash ).
- ctype (php-ctype) .
- JSON (php-json) .
- mbstring (php-mbstring) to improve the performance.
- Zip (php-zip) allow uploading of ZIP files to PHPMyAdmin.
- phpseclib (php-phpseclib) The PHP Secure Communications Library.
- libxml (php-xml). allows import of XML and Open Document Spreadsheet files.
- curl (php-curl) To support displaying phpMyAdmin’s latest version, you need to
- GD2 (php-gd) to display inline thumbnails of JPEGs (“image/jpeg: inline”).
- openssl (openssl) Needed for default authentication ( using cookies ), also If you want to enable reCAPTCHA.
- Database connection (php-mysql) to connect to database connection.
- Nginx webserver.
- MariaDB or MySQL database.
To install PHPMyAdmin required packages in Debian 10. Check this article on how to install the latest PHP version on Debian. It’s mandatory to have Nginx, PHP, and MySQL installed to be able to continue.
Download & Install PHPMyAdmin
to get the latest version of the software, it’s strongly recommended to visit their website and download it.
or change the version of the file
wget https://files.phpmyadmin.net/phpMyAdmin/5.1.1/phpMyAdmin-5.1.1-all-languages.tar.gzExtract phpMyAdmin archive
sudo tar -zxvf phpMyAdmin-5.0.1-all-languages.tar.gzMove the phpMyAdmin directory to the default Nginx html directory /var/www/html.
sudo mv phpMyAdmin-5.0.1-all-languages /var/www/html/phpMyAdminConfigure PHPMyAdmin.
in order to start configuration, we will copy the sample configuration file or rename it to config.php.
cd /var/www/html/phpMyAdmin
sudo cp -pr config.sample.inc.php config.inc.php
Then, we edit the configuration file to:
- Configure Authintecation cookies settings by adding the blowfish secret key.
- Enter the database connection setting to the database
- Import meta-data database scription required for PHPMyAdmin to function.
cd /var/www/html/phpmyadmin
sudo vi config.inc.php
First: Configure config.inc.php
This is key is required for the default cookie-based authentication to encrypt passwords in the browser cookies. In addition, the required length of the string must be 32 chars long.
You can type whatever random letters you think of or just generate the whole line using the Generate blowfish secret. then update the line that contain the variable ‘blowfish_secret’.
$cfg['blowfish_secret'] = ''; / YOU MUST FILL IN THIS FOR COOKIE AUTH! */ should be similar to the following
$cfg['blowfish_secret'] = 'c3rDAfiWsVXDRQi1f/HfTM[HBda7n[HU';Then save and exit the file
Second: Create meta-data Tables
It’s important to realize, that most applications require a meta-data structure that could be file-based or stored in a database. luckily In our case, PHPMyAdmin uses a database.
Thus, we will import the provided SQL script to create a new database tables structure for it.
cd /var/www/html/phpmyadmin/sql
mysql < ./create_tables.sql
Configure Nginx for PHPMyAdmin
In this position, we will enable Nginx PHP support. because, If you tried to access the path you will get either error messages the 403 Forbidden or 404 not found. this is because we didn’t configure the Nginx to understand PHP language or PHP does not have access permission to render the PHP files.
In our example, we put the PHPMyAdmin into the default Nginx directory so you can test accessing it using context
http://YOUR-SERVER-IP/phpmyadmin/
Configure nginx to understand PHP (Fix 404 Error)
At this point, we will edit the default virtual host file for Nginx. then, update it with the required settings.
Usually, you will a commented lines related to PHP. hence we will uncomment them. as bellow:
vim /etc/nginx/site-enabled/default.confThen change the following lines.
index index.html index.htm;

#location ~ \.php$ {
#        include snippets/fastcgi-php.conf;
#        # With php-fpm (or other unix sockets):
#        fastcgi_pass unix:/run/php/php7.3-fpm.sock;
#        # With php-cgi (or other tcp sockets):
#        # fastcgi_pass 127.0.0.1:9000;
#}
To be like the following. Notice the added index.php to the index directive. also uncommented the location related to PHP.
index index.php index.html index.htm;

location ~ \.php$ {
        include snippets/fastcgi-php.conf;
        # With php-fpm (or other unix sockets):
        fastcgi_pass unix:/run/php/php7.3-fpm.sock;
        # With php-cgi (or other tcp sockets):
        # fastcgi_pass 127.0.0.1:9000;
}
now the Nginx can understand PHP. we need to make sure that the PHP engine can access the directory.
Grant php acess to PHPMyAdmin (Fix 403 Forbidden)
In case if you followed my instruction. the owner of the PHPMyAdmin directory would be root. however, the default owner and group for the PHP engine in Debian is the www-data user.
Therefore, we need to change the ownership of the PHPMyAdmin and all related files to be owned by www-date
chown -R www-data:www-data /var/www/html/phpmyadminThis will allow PHP to access the directory and read the content
OPTIONAL : Create subdomain for your PHPMyAdmin
If you need to use a separate subdomain for you PHPMyAdmin. In this case, move the directory out of the html directory. then create a virtual host file named phpMyAdmin.conf in the /etc/nginx/conf.d or /etc/nginx/sites-enabled.
sudo mv /var/www/html/phpmyadmin /var/www/phpmyadmin

sudo nano /etc/nginx/site-enabled/phpMyAdmin.conf
Add the following making changes to the domain name. You can replace it with your own domain name or your server’s IP Address.
server {
listen 80;
server_name pma.gust.edu.kw;
root /var/www/phpMyAdmin;
location / {
index index.php;
}
## Images and static content is treated different
location ~* ^.+.(jpg|jpeg|gif|css|png|js|ico|xml)$ {
access_log off;
expires 30d;
}
location ~ /\.ht {
deny all;
}
location ~ /(libraries|setup/frames|setup/libs) {
deny all;
return 404;
}
location ~ \.php$ {
include /etc/nginx/fastcgi_params;
fastcgi_pass 127.0.0.1:9000;
fastcgi_index index.php;
fastcgi_param SCRIPT_FILENAME /var/www/phpMyAdmin$fastcgi_script_name;
}
}sudo chmod 777 /var/lib/php/session/
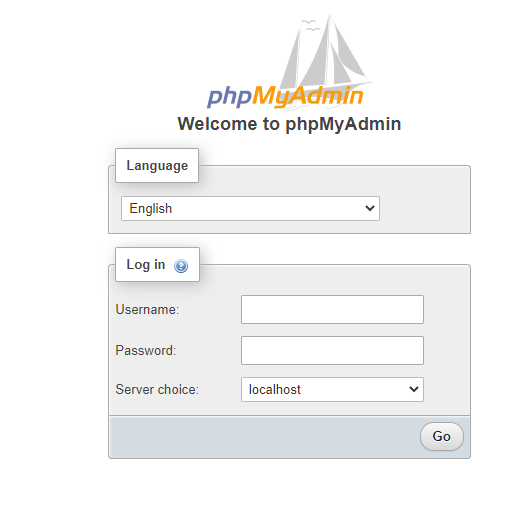
Conculsion
In this final stage, you should be able to open phpMyAdmin home page normall either from context or subdomin. Just enter username and password